![]()


How to Create a LinkedIn Profile — The Complete Step-by-Step Guide to Building a Profile That Works for You | Digital Drolia
Let me ask you something honest.
When was the last time you Googled someone before meeting them professionally — a potential client, a new business contact, a speaker at an event you attended? And when you searched their name, what came up first?
Almost always, it is their LinkedIn profile.
LinkedIn is the world’s largest professional network with over 1 billion members across 200 countries. It is the first place recruiters look when they are hiring. It is where clients research service providers before reaching out. It is where investors look up founders. It is where collaborators find each other. It is where your professional reputation lives online — whether you have built it intentionally or not.
Here is the uncomfortable truth: if you do not have a LinkedIn profile, or if you have one that is incomplete, outdated, or poorly set up — you are being judged by that absence or inadequacy every single day without even knowing it. Opportunities are going to people who showed up on LinkedIn looking credible, experienced, and approachable. People who might be less qualified than you, but who had the good sense to build a profile that represented them well.
This guide is going to change that.
We are going to walk through every single element of creating a powerful, professional LinkedIn profile — from the very first step of setting up your account to the finishing touches that most people never bother with but that make an enormous difference. Not just what to fill in, but why each element matters and how to approach it strategically.
By the end of this guide, you will have a LinkedIn profile that represents you at your best, gets found by the right people, and opens doors you did not even know existed.
Let us get started.

Why LinkedIn Specifically — Understanding the Platform Before You Build On It
Before we talk about setup, let us briefly establish why LinkedIn deserves your time and attention in a way that other social networks might not.
LinkedIn is fundamentally different from Instagram, Facebook, or Twitter. Those platforms are about entertainment, connection, and culture. LinkedIn is about professional identity and economic opportunity.
When someone visits your LinkedIn profile, they are not casually browsing — they are researching you with a specific purpose. They want to know if you are qualified for a role they are filling. They want to know if you have the experience to handle a project they need help with. They want to know if you are the kind of professional they want to partner with, hire, or refer to others.
This intent-driven nature of LinkedIn visits is what makes the platform so valuable — and what makes a well-built profile so much more powerful than a mediocre one. Every profile visit is a real opportunity. Whether that opportunity converts into something meaningful depends almost entirely on what the visitor finds when they arrive.
LinkedIn also has significant SEO value — LinkedIn profiles consistently rank on the first page of Google results for a person’s name. For most professionals, their LinkedIn profile is their most visible piece of online real estate. It is almost certainly the first thing a stranger will find when they search for you.
Given all of this — building a strong LinkedIn profile is not optional for any serious professional, business owner, freelancer, or student in 2025. It is foundational.

Part One — Setting Up Your LinkedIn Account
Step 1 — Go to LinkedIn and Create Your Account
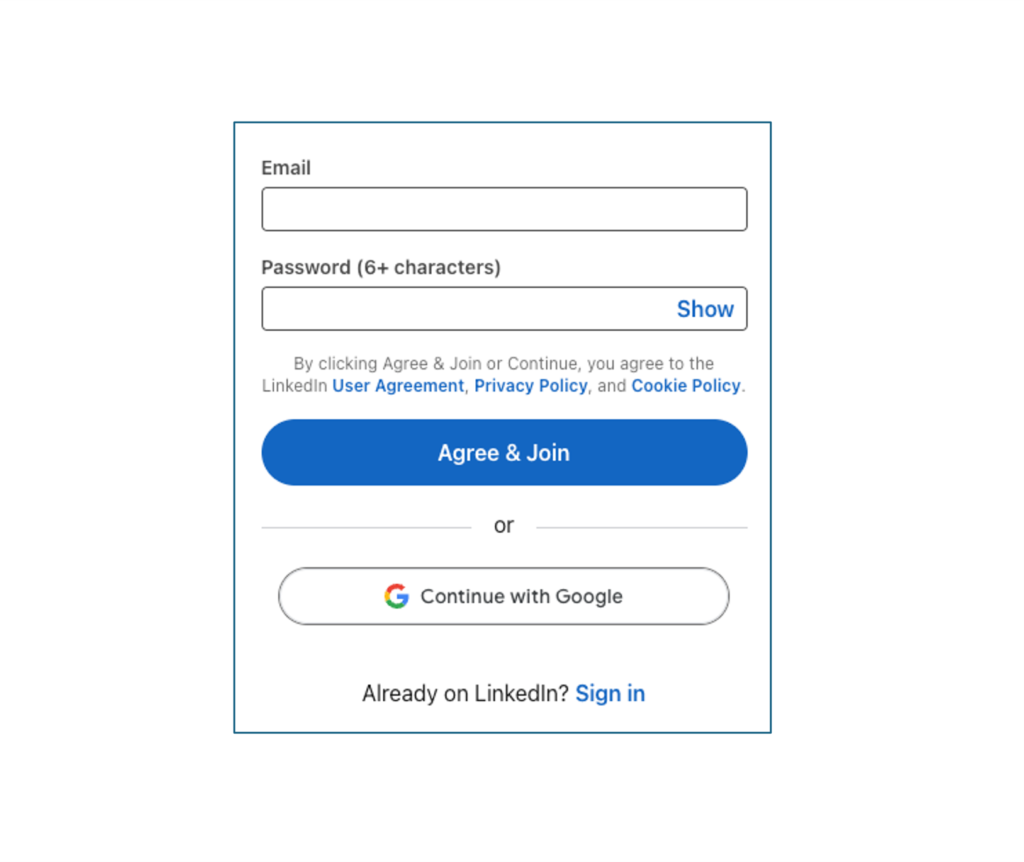
Open your browser and navigate to linkedin.com. Click the “Join now” button on the homepage.
You will be asked to sign up with either your email address or your phone number. Use your professional email — ideally your work email if you have one, or a clean personal email that includes your name. Avoid nicknames or unprofessional email addresses.
Create a strong password, confirm your country and region, and complete the initial sign-up prompts. LinkedIn will ask for your first and last name — use your real, full professional name. This is how people will find you and how you will appear in search results.
LinkedIn will then walk you through an initial setup wizard asking about your current employment status, your industry, and your location. Fill these in as accurately as possible — they help LinkedIn connect you with relevant people and opportunities from the very beginning.
Step 2 — Choose and Customize Your LinkedIn URL
This is one of the most overlooked steps in LinkedIn setup — and one of the most important.
By default, LinkedIn assigns you a URL that looks something like linkedin.com/in/yourname-random-numbers-and-letters. This is messy, unmemorable, and looks unprofessional when you share it.
LinkedIn allows you to customize your public URL to something clean and personal — like linkedin.com/in/rahulverma or linkedin.com/in/priyasharma-ca.
How to customize your URL:
Click on your profile photo to go to your profile page. Look for the “Edit public profile & URL” button on the right side of the screen. In the top right corner of the page that opens, you will see your current URL with an edit (pencil) icon next to it. Click that icon and type your preferred URL.
Best practices for your LinkedIn URL:
Use your full name if it is available — firstname-lastname is the ideal format. If your name is common and that URL is taken, try adding your profession — firstname-lastname-ca, firstname-lastname-marketing, firstname-lastname-delhi. Keep it short, clean, and professional. Avoid numbers and underscores if possible.
Once customized, this URL goes on your business card, your email signature, your resume, your website, and anywhere else you want people to find your professional profile.

Part Two — Building Your Profile — The Visual Elements
Step 3 — Upload Your Profile Photo
Your profile photo is the most immediately visible element of your LinkedIn presence. It appears next to your name in search results, in connection requests, in comments on posts, and in messages. Before anyone reads a single word about you, they have already formed an impression from your photo.
LinkedIn research consistently shows that profiles with photos receive dramatically more views, connection requests, and messages than profiles without them. This is not surprising — a profile without a photo feels anonymous and untrustworthy.
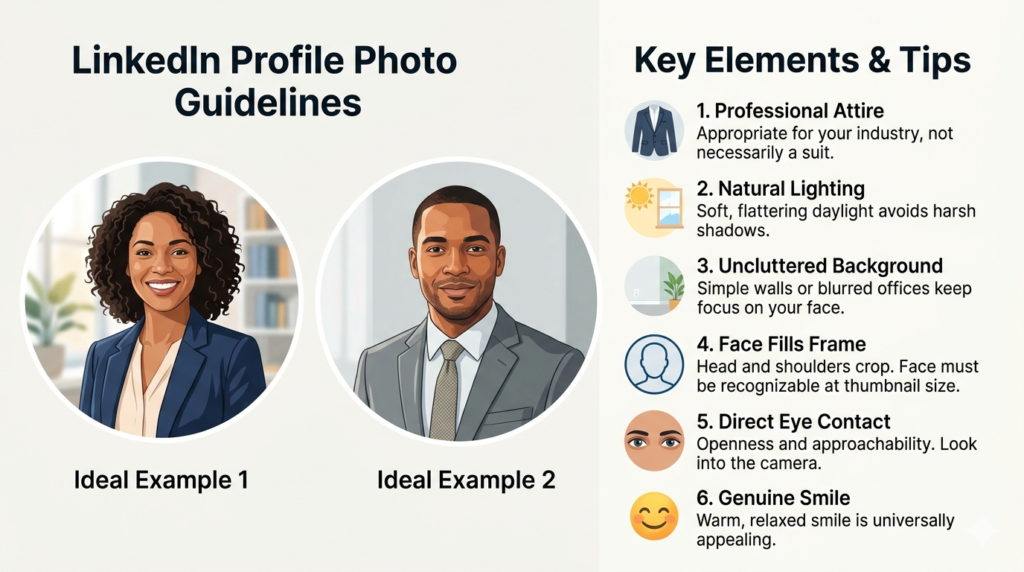
What makes a great LinkedIn profile photo:
Professional appearance is essential. LinkedIn is a professional network, and your photo should reflect that. This does not mean you need to be wearing a suit — it means your clothing should be appropriate for your industry and the impression you want to make. A doctor might wear their white coat. A creative professional might dress more casually. A corporate professional might wear formal business attire. Dress for the role you want to be seen in.
Good lighting makes an enormous difference. Natural light — a window on an overcast day — is the most flattering and easiest to achieve. Avoid harsh overhead lighting, flash photography that creates harsh shadows, or dim indoor lighting that makes you look unclear and unprofessional.
A simple, uncluttered background works best. A plain wall, a clean office setting, or a simple outdoor background are all excellent. Busy, distracting backgrounds pull attention away from your face.
Your face should fill most of the frame. LinkedIn profile photos display as small circles — a full-body shot or a photo taken from across a room will make your face tiny and unrecognizable at thumbnail size. Crop to roughly shoulder level, with your face taking up most of the frame.
Make eye contact with the camera. A direct, confident gaze communicates openness and approachability. Looking away or down creates an impression of distraction or discomfort.
Smile genuinely. A warm, natural smile is almost universally more appealing and approachable than a blank or overly serious expression. You do not need a forced, toothy grin — just a genuine, relaxed expression.
Technical specifications: LinkedIn recommends photos between 400 x 400 and 7680 x 4320 pixels. The image displays as a circle, so make sure nothing important is too close to the edges. Maximum file size is 8MB.
You do not need a professional photographer for a great LinkedIn photo. A friend with a smartphone, good natural light, and a clean background can produce an excellent result. But do invest the time in getting a good photo — it will pay dividends for years.
Step 4 — Add Your Background Banner Photo
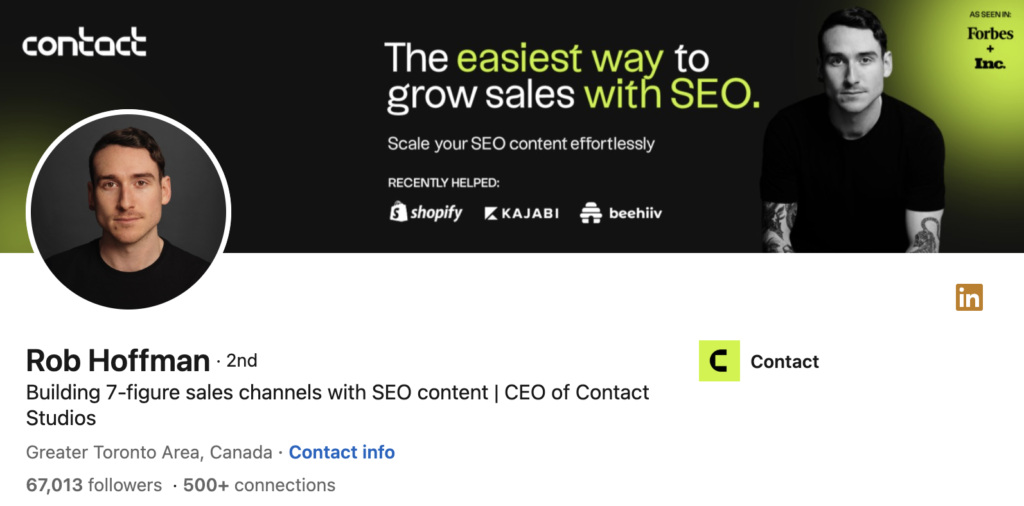
Directly behind your profile photo on your LinkedIn profile is a large rectangular banner image — the background photo. Most people leave this as LinkedIn’s default blue gradient, which is a significant missed opportunity.
Your background banner is prime real estate. It is the largest visual element on your profile page. It is one of the first things visitors see when they land on your profile. And unlike every other element on your profile, it is a completely blank canvas that you can use however you like.
What to put in your LinkedIn background banner:
For most professionals, the best background banners communicate something about their professional identity or brand. Options include a clean image of your city’s skyline or a location that is relevant to your work, a branded graphic with your name, title, and key message, a photo from a professional event or speaking engagement, an image that reflects your industry, or a simple visual with your tagline or value proposition.
What to avoid: Overly busy or cluttered designs that are hard to read, low-resolution images that appear pixelated, generic stock photos that could belong to anyone, or anything that feels mismatched with your professional identity.
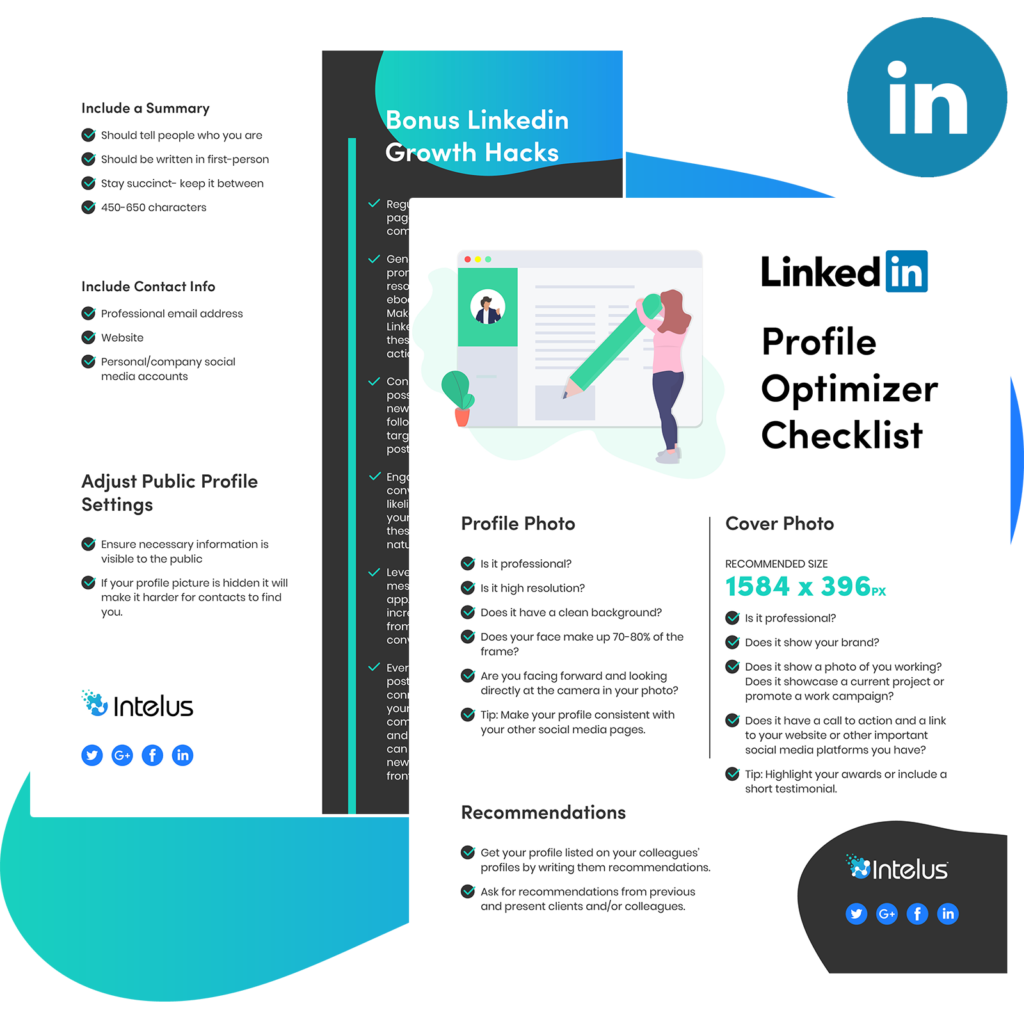
Technical specifications: LinkedIn recommends a background photo of 1584 x 396 pixels. Canva has free LinkedIn banner templates in exactly the right dimensions — an excellent starting point if you are not a designer.
To upload your background photo, go to your profile page and click the pencil (edit) icon that appears in the top right area of the banner space when you hover over it.
Part Three — Building Your Profile — The Text Elements
Step 5 — Write Your LinkedIn Headline
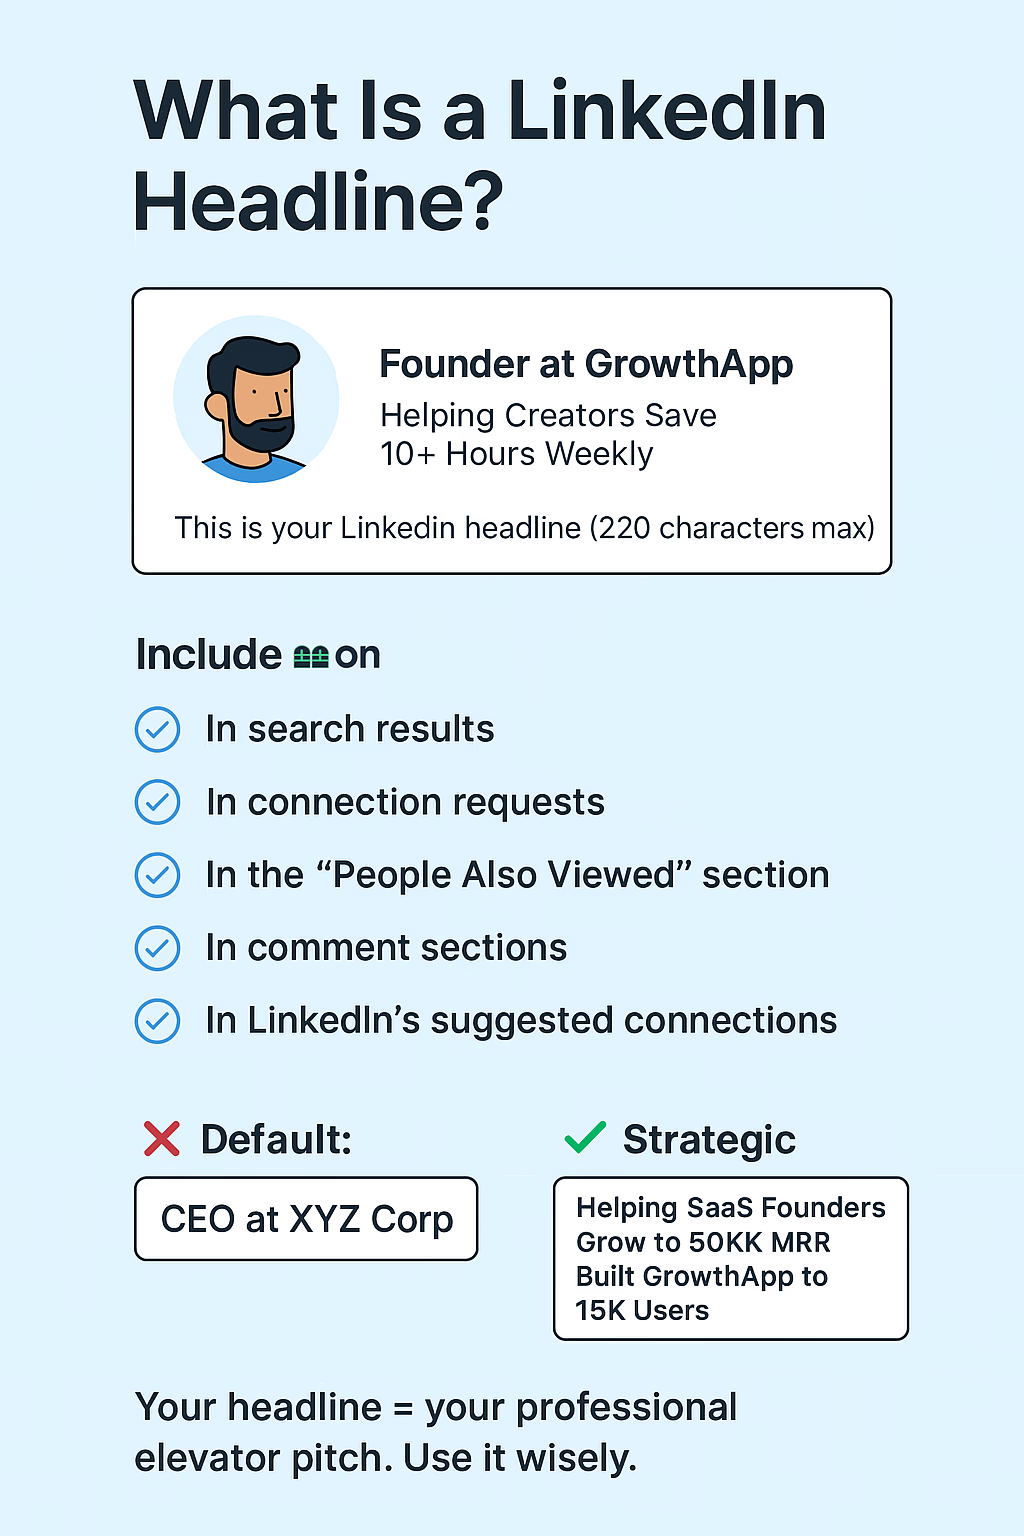
Your LinkedIn headline is the single line of text that appears directly below your name everywhere on LinkedIn — on your profile, in search results, in connection requests, in comments on posts, and in messages. You have 220 characters to work with.
Most people use their headline simply as their current job title. “Marketing Manager at XYZ Company.” “Software Engineer.” “Student at Delhi University.” This approach is a significant waste of the headline’s potential.
Your headline is LinkedIn’s most visible piece of text beyond your name. It appears in search results before anyone even visits your profile. It is what people read to decide whether to click on your profile at all. And it plays a significant role in LinkedIn’s search algorithm — the keywords in your headline affect whether you appear when recruiters or clients search for someone with your skills.
A powerful LinkedIn headline does three things simultaneously:
It communicates your professional identity clearly. It includes searchable keywords that help you get found. And it conveys your value or differentiation in a way that makes someone want to learn more.
The headline formula that works:
Current role or professional identity + who you help or what you specialize in + the value you deliver or your key differentiator
Examples of weak headlines:
- Marketing Manager
- Freelancer
- Student
- Business Development Professional
Examples of strong headlines:
- Digital Marketing Manager | Helping D2C Brands Scale on Instagram & Google Ads | 5+ Years in Performance Marketing
- Freelance Copywriter | B2B SaaS Specialist | Turning Complex Ideas Into Copy That Converts
- CA Final Student | Tax & Audit Enthusiast | Aspiring Finance Professional | ICAI 2025
- Business Development Leader | Building Strategic Partnerships for EdTech Startups in India
Notice how the strong examples are specific, keyword-rich, and give the reader an immediate sense of what this person does and why they are worth knowing more about.
If you are a student or recent graduate without extensive work experience, your headline can highlight your academic focus, key skills, relevant projects, and career aspirations. You do not need years of experience to write a compelling headline — you need clarity about where you are headed and what you bring to the table.
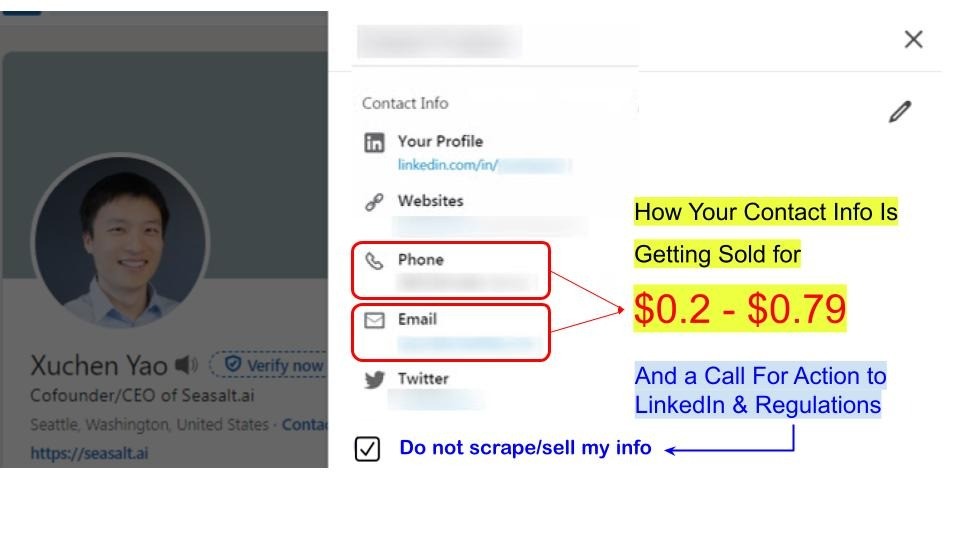
Step 6 — Complete Your Contact Information
Go to your profile and click “Contact info” to add your professional contact details. Fill in every relevant field.
Your website: If you have a portfolio website, agency website, or personal blog — add it here. LinkedIn gives you the option to customize the display text for your website link rather than showing the raw URL.
Your email address: Use a professional email. This is how people will reach out to you directly. Make sure it is an address you check regularly.
Your phone number: This is optional and can be set to visible only to your connections, but including it makes it easier for serious professional contacts to reach you.
Your Twitter/X profile: If you are active on Twitter professionally, link it here.
Your LinkedIn handle: Confirm your custom URL is correctly displayed.
Your address: Adding your city and country (without full street address, for privacy) helps with local professional networking and appears in searches filtered by location.
Filling in your contact information completely makes you significantly more reachable — which is the entire point of a professional networking profile.
Step 7 — Write Your About Section
The About section — LinkedIn’s equivalent of a professional bio — is one of the most important and most neglected parts of most LinkedIn profiles. You have up to 2,600 characters, and you should use most of them.
This is where you tell your professional story. Not in a formal, resume-like way — in a genuine, human, first-person voice that gives the reader a real sense of who you are, what you have done, and what you stand for professionally.
LinkedIn shows only the first three lines of your About section before cutting off with a “See more” button. This means your opening lines are critical — they need to be compelling enough to make someone want to tap “See more.”
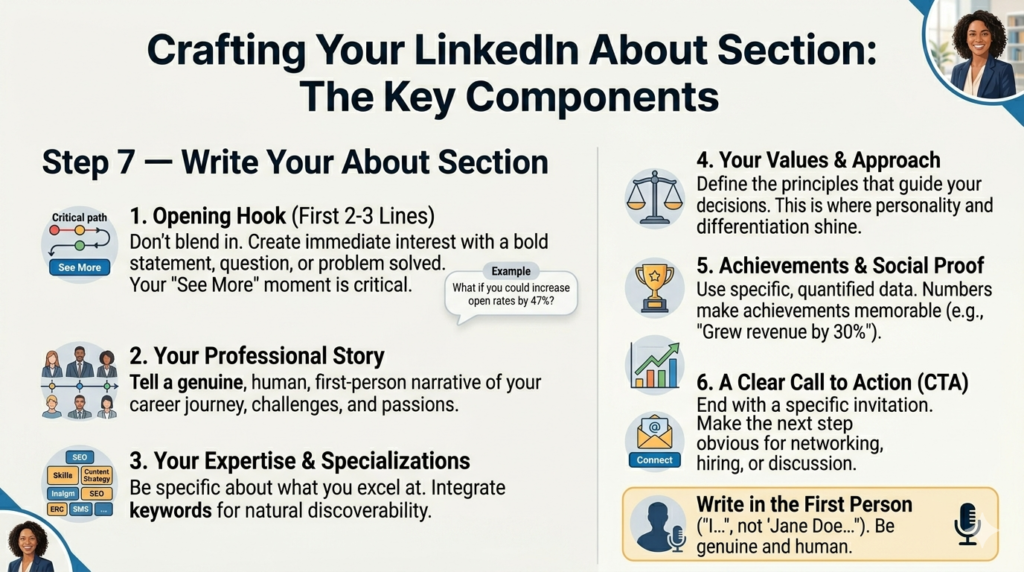
The structure of a powerful LinkedIn About section:
Opening hook (first 2-3 lines): Do not start with “I am a passionate professional with X years of experience.” This is how almost every LinkedIn About section opens — which means it immediately blends into the background. Start with something that creates immediate interest. A bold professional statement. A surprising fact about your journey. A question that your ideal reader will immediately identify with. A problem you solve stated directly and compellingly.
Your professional story: After your hook, tell the story of how you got to where you are. What drew you to your field? What experiences have shaped your professional identity? What challenges have you overcome? What have you built or contributed? Stories create connection in a way that bullet points never can.
Your expertise and specializations: Be specific about what you do and what you are particularly skilled at. Use natural language to include the keywords that people in your field search for — this improves your discoverability in LinkedIn’s search algorithm.
Your values and approach: What do you believe about the right way to do your work? What principles guide your professional decisions? This is where personality and differentiation emerge. Two people can have identical job titles and years of experience but completely different values and approaches — and those differences matter to the people who want to hire or work with you.
Achievements and social proof: Specific, quantified achievements are far more compelling than generic statements. “Increased email open rates by 47% through strategic segmentation” is memorable. “Improved email performance” is not. Use numbers wherever you honestly can.
A clear call to action: End your About section with a specific invitation. “Open to new opportunities in digital marketing — feel free to connect.” “If you are looking for a reliable copywriter for your next campaign, send me a message.” “I enjoy connecting with founders and marketers — reach out if you would like to exchange ideas.” Make the next step obvious.
Write in first person. “I help brands grow their digital presence” connects more than “Experienced marketing professional specializing in digital growth.” LinkedIn is a networking platform, and first person feels more human and direct in a networking context.
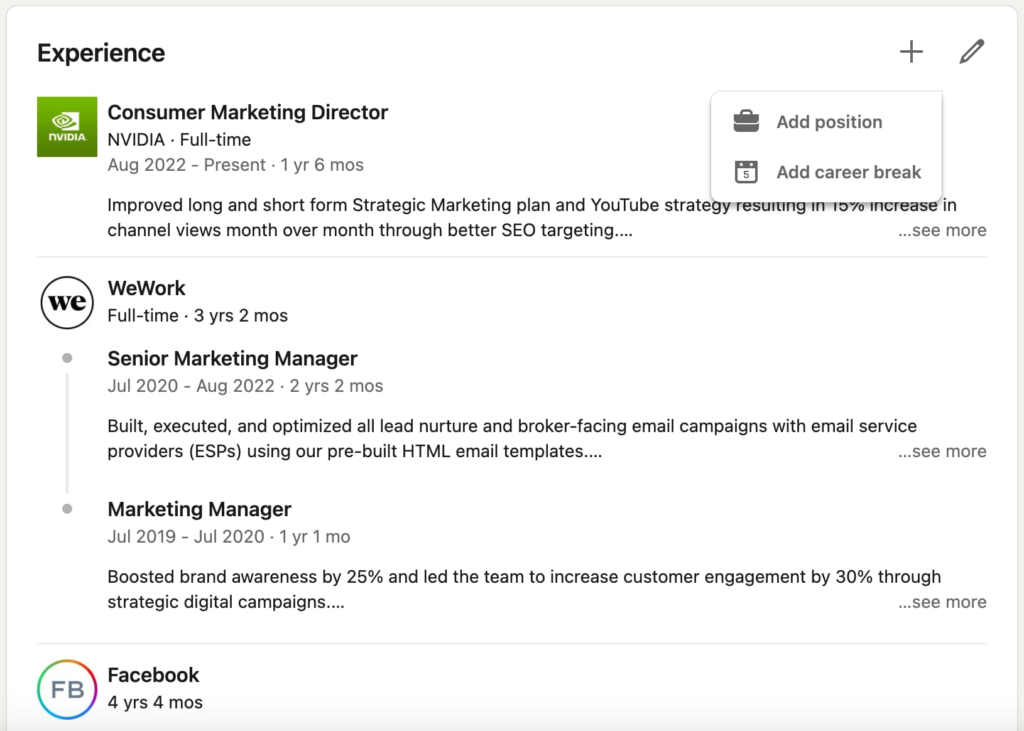
Step 8 — Add Your Work Experience
Your work experience section is the backbone of your LinkedIn profile — it is where you establish your professional history and demonstrate the trajectory of your career.
For each position, fill in the company name, your job title, your employment dates, the location, and a description of your role.
The description is where most people underinvest. Most LinkedIn work experience descriptions are either completely empty or consist of a single line like “Managed social media accounts.” Neither tells the reader anything meaningful.
A strong work experience description does several things. It explains what you were responsible for. It describes what you actually accomplished. It quantifies your impact wherever possible. And it uses language and keywords that your professional audience recognizes and searches for.
A framework for strong experience descriptions:
Start with a one or two sentence overview of the role — what the company does, what your position involved, and your scope of responsibility.
Then list three to six bullet points of specific accomplishments — things you did, created, improved, or contributed that had measurable impact. Each bullet should follow this pattern: action verb + what you did + the result or scale.
Examples of weak vs. strong bullet points:
Weak: “Managed social media for the company.” Strong: “Managed social media presence across Instagram, Facebook, and LinkedIn — growing combined following from 2,400 to 18,000 in 14 months through a combination of organic content strategy and targeted paid promotion.”
Weak: “Helped with client projects.” Strong: “Collaborated with a cross-functional team to deliver a full website redesign for a major FMCG client — completing the project two weeks ahead of schedule and 8% under budget.”
Weak: “Responsible for sales.” Strong: “Consistently exceeded monthly sales targets by 15-25%, contributing ₹1.2 crore in new business revenue in FY2023-24 — ranked #2 among a team of 12 sales executives.”
The more specific and quantified your bullets, the more credible and impressive your experience becomes. Go back through every role you have held and ask yourself: what did I actually achieve here? What would not have happened if I had not been in that role? What numbers can I attach to my contributions?
Add media to your experience entries. LinkedIn allows you to attach links, documents, images, presentations, and videos to each work experience entry. If you have a portfolio piece, a project you are proud of, a presentation you delivered, a campaign you ran, or any other tangible evidence of your work — attach it here. Visual proof is always more compelling than text description alone.
Step 9 — Add Your Education
Fill in your education section completely — your degree, your institution, your field of study, and your graduation year. For students and recent graduates, this section is particularly important as it forms a significant part of your professional identity.
Beyond the basics, use the description field in each education entry to mention relevant coursework, academic achievements, extracurricular activities, leadership roles, and projects. If you graduated with distinction, won any awards, led any student organizations, or completed any notable academic projects — this is where to mention them.
LinkedIn also allows you to add the activities and societies you participated in during your education. Student council, debate team, college magazine, technical clubs, cultural committees — these all signal initiative, leadership, and engagement beyond just attending classes.
If you have completed any continuing education — executive courses, online certifications, professional development programs — you can add these here or in the Licenses & Certifications section.
Step 10 — Add Licenses and Certifications
The Licenses and Certifications section is highly valuable for professionals in regulated industries (like CAs, lawyers, doctors, and engineers) as well as for anyone who has completed relevant professional certifications.
Add every certification that is relevant to your professional goals. Google Analytics, Meta Blueprint, HubSpot Content Marketing, AWS certifications, ICAI membership, PMP certification, IELTS, CFA — whatever certifications demonstrate your skills and credibility in your field.
For each certification, include the issuing organization, the issue date, and the expiration date if applicable. LinkedIn also allows you to add a credential ID and credential URL — include these when available, as they make your certification verifiable.
Certifications serve an important function on LinkedIn — they are keyword-rich content that improves your search discoverability, and they provide concrete evidence of skills that might otherwise be difficult to demonstrate.

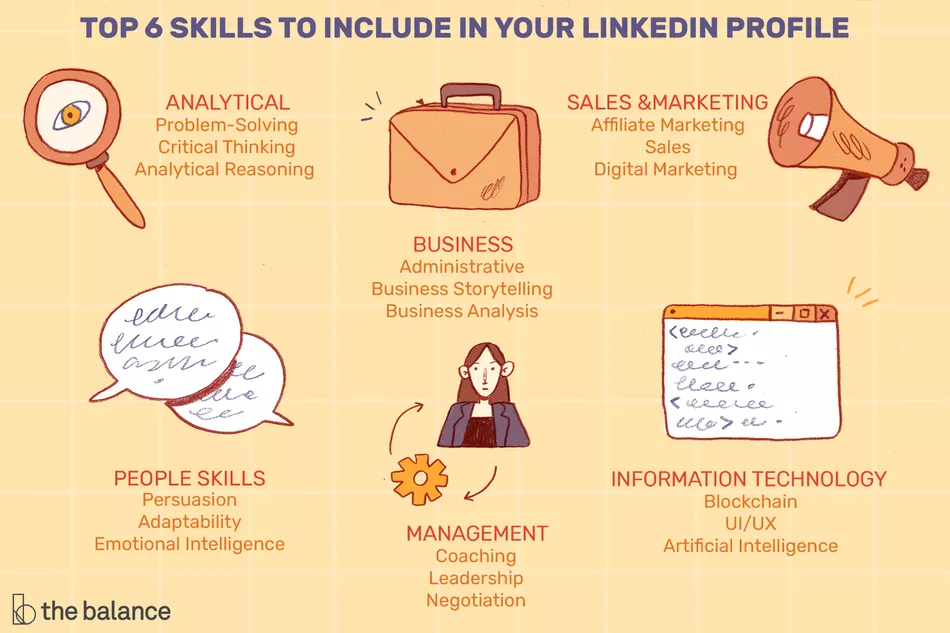
Step 11 — Add Your Skills
LinkedIn’s Skills section allows you to list up to 50 skills on your profile. These skills are searchable — recruiters and clients searching for specific capabilities will find profiles that list those skills.
Be thoughtful and strategic about which skills you list. Include both hard skills (specific technical capabilities like Google Analytics, Python, Financial Modeling, AutoCAD, or SEO) and soft skills that are valued in your field (Leadership, Project Management, Client Relations, Strategic Planning). Prioritize skills that are most relevant to your career goals and most commonly searched for in your target roles or industries.
LinkedIn allows your connections to endorse your skills — adding a small count of people who have confirmed you possess that skill. While endorsements are not the most rigorous validation, they add a layer of social proof. The skills with the most endorsements appear at the top of your section.
You can also take LinkedIn Skill Assessments — short multiple-choice tests that verify your knowledge of specific tools and platforms. Profiles with passed assessments earn a verification badge next to those skills, which adds genuine credibility.
To add skills, go to your profile and scroll to the Skills section. Click “Add skills” and start typing — LinkedIn will suggest relevant skills based on your profile and role.
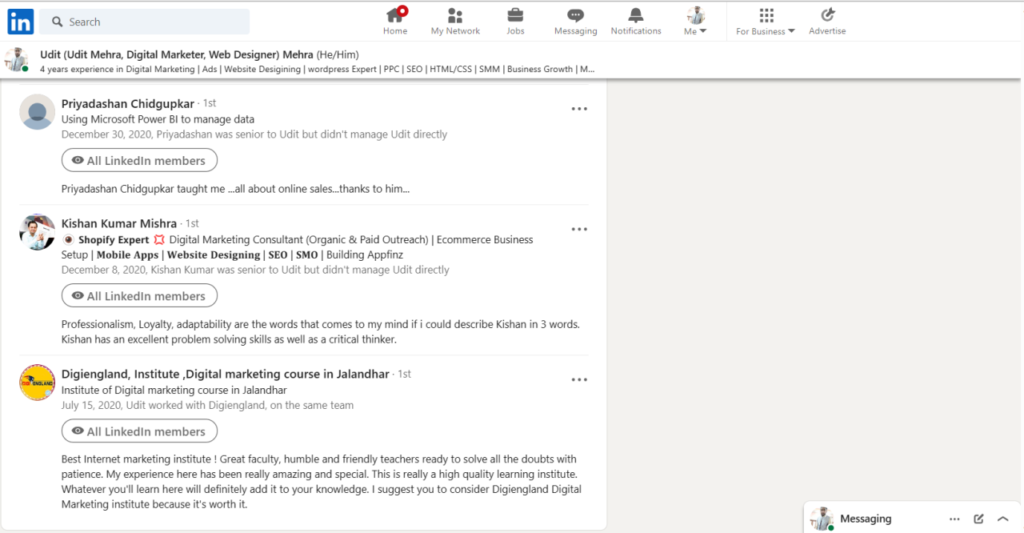
Step 12 — Request Recommendations
LinkedIn Recommendations are written testimonials from people who have worked with you — managers, colleagues, clients, professors, or collaborators. They are one of the most powerful credibility signals on your entire profile because they represent someone else’s genuine words about your work.
A profile with three to five strong recommendations is significantly more compelling than an identical profile with no recommendations. Recruiters, clients, and collaborators actively look for recommendations as evidence that other professionals have found your work valuable.
How to request a recommendation:
Go to your profile and scroll to the Recommendations section. Click “Ask for a recommendation.” You will be asked to choose your relationship with the person and the position you held when you worked together. Then you can write a brief, personalized message explaining what you are working toward and what specific aspects of your working relationship you would like them to speak to.
The personal message matters enormously. A generic “Please write me a LinkedIn recommendation” is easy to put off indefinitely. A specific, thoughtful request — “I am building my LinkedIn presence as I transition into digital marketing, and I would love if you could speak to the social media campaign work we did together for the Diwali launch — particularly the results we achieved” — gives the person clear direction and makes writing the recommendation much easier.
Be strategic about who you ask. The most valuable recommendations come from people who worked closely with you, who are well-respected in their own right, and who can speak to specific skills or achievements rather than giving vague, generic praise.
Give recommendations first. Writing sincere, specific recommendations for people you have genuinely worked with is not only a generous professional act — it also often prompts them to write one in return without you having to ask.
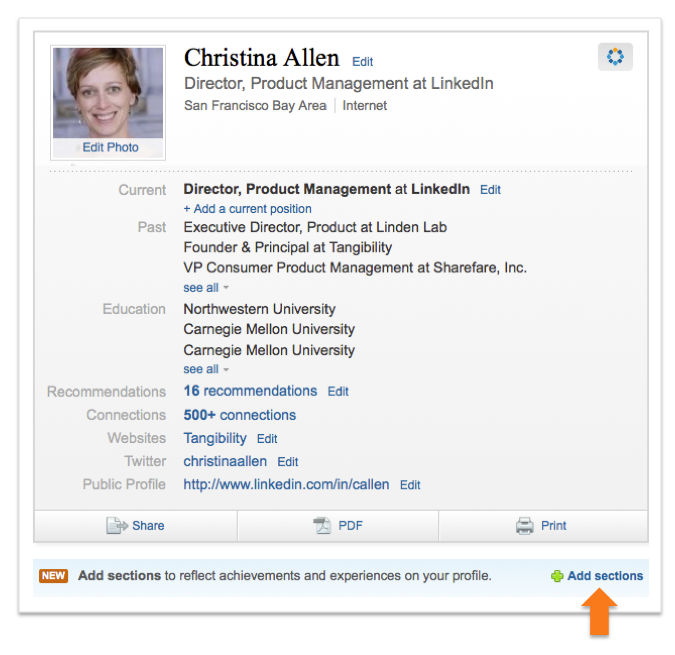
Step 13 — Add the Additional Sections That Differentiate Your Profile
LinkedIn offers several additional sections beyond the standard ones — and using them strategically can significantly differentiate your profile from the thousands of similar profiles in your industry.
Projects: If you have worked on specific projects — in your job, freelance, academic, or personal — the Projects section lets you describe them in detail, including links, collaborators, and media. For students and early-career professionals especially, projects are powerful evidence of capability when work experience is limited.
Publications: If you have written articles, research papers, case studies, or contributed to publications — add them here. This is particularly valuable for thought leaders, academics, researchers, and subject matter experts.
Volunteer Experience: Volunteer work demonstrates character, values, and often highly transferable skills. It also shows a side of you that purely professional entries do not — and many recruiters and hiring managers genuinely value it.
Honors and Awards: Academic distinctions, professional awards, recognition from employers or industry bodies — list them all. Specific recognitions are far more powerful than general claims of excellence.
Languages: If you speak multiple languages — particularly ones that are professionally relevant — list them here with your proficiency level. In India’s multilingual professional environment, this can be a meaningful differentiator.
Causes: LinkedIn allows you to list professional causes you care about. For many professionals and especially in certain industries, shared values are an important factor in professional relationships.
Featured Section: This is one of the most impactful sections on a LinkedIn profile and one of the most underused. The Featured section appears near the top of your profile — right after your About section — and allows you to pin specific content for visitors to see immediately. You can feature LinkedIn posts that performed well, articles you have written, external links to your portfolio or website, documents, presentations, and media. Choose two or three pieces of your best and most representative work to feature here.
Part Four — Optimizing Your Profile for Search and Discovery
Step 14 — Understand LinkedIn’s Search Algorithm
LinkedIn is essentially a search engine for professionals. Recruiters, clients, and collaborators use LinkedIn’s search function constantly — searching for people with specific skills, in specific industries, in specific locations, with specific experience levels.
Whether your profile appears in these search results — and where — is determined by LinkedIn’s algorithm. Understanding the key factors that influence this algorithm helps you optimize your profile for maximum discoverability.
Completeness: LinkedIn assigns each profile an “All-Star” rating when it meets certain completeness criteria. Profiles that reach All-Star status are shown more prominently in search results. To reach All-Star status, you need a profile photo, a headline, an About section, your location and industry, at least one current position with a description, at least two past positions, your education, at least three skills, and at least fifty connections.
Keywords: LinkedIn’s search algorithm matches search queries against the text on your profile. The keywords in your headline, About section, work experience descriptions, skills, and other sections all contribute to your search visibility. Research the keywords that people searching for someone like you would use — and use those keywords naturally throughout your profile.
Connection network: LinkedIn’s search algorithm gives weight to your proximity in the professional network — first-degree connections appear before second-degree connections in search results. Building a strong, relevant network improves your visibility.
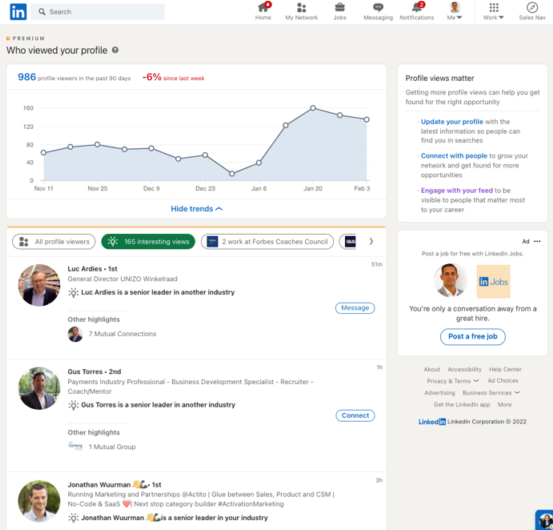
Engagement: Profiles of people who are active on LinkedIn — posting content, commenting, sharing — appear more prominently than completely dormant profiles.
Step 15 — Build Your Connection Network Strategically
Your LinkedIn network is not just a number — it is the foundation of your platform’s value. The people you are connected to determine whose content you see, who sees your content, who appears in your search results, and who can find you in theirs.
Start with people you already know. LinkedIn will suggest connections based on your email contacts, your phone contacts, and people who work at companies you have worked at. Connect with colleagues, classmates, professors, mentors, clients, and anyone else you have a genuine professional relationship with.
Be strategic about cold connection requests. When connecting with people you do not already know, always include a personalized connection note. A generic connection request to a stranger has a low acceptance rate. A brief, specific note — explaining who you are, why you want to connect, and what you have in common — dramatically improves the odds of acceptance.
Quality matters more than quantity. A network of 500 relevant, engaged professionals in your field is more valuable than a network of 5,000 random connections. Focus on connecting with people who are actually in your industry, your target market, or your area of professional interest.
Aim for 500+ connections. LinkedIn displays your connection count as “500+” once you cross that threshold — it does not display the exact number. This threshold is widely recognized as a signal of professional seriousness and active networking. Reaching 500+ connections should be an early goal.
Part Five — Making Your Profile Active and Alive
Step 16 — Start Posting and Engaging
A complete, perfectly optimized LinkedIn profile that is completely silent — no posts, no comments, no activity — is significantly less effective than a slightly less polished profile from someone who shows up regularly.
LinkedIn rewards activity. The algorithm gives more visibility to profiles and content from people who engage consistently. More importantly, your network notices your presence — or your absence.
Start by engaging before you post. Before writing your first post, spend a week commenting thoughtfully on other people’s posts in your network. Not generic “Great post!” comments — genuine, specific responses that add something to the conversation. This builds your visibility in others’ feeds, warms up your presence on the platform, and gives you a feel for the kind of content that resonates in your professional community.
Then start posting. Even one post per week on a topic relevant to your professional expertise — a lesson learned, an observation about your industry, a resource you found valuable, a reflection on a professional experience — builds your presence and reputation over time. LinkedIn’s audience is primed to engage with thoughtful, authentic professional content.
Write articles on LinkedIn. LinkedIn’s native article feature — long-form content published directly on the platform — is one of the most powerful ways to establish thought leadership. Articles get indexed by Google, appear on your profile permanently, and position you as someone with genuine expertise and depth.

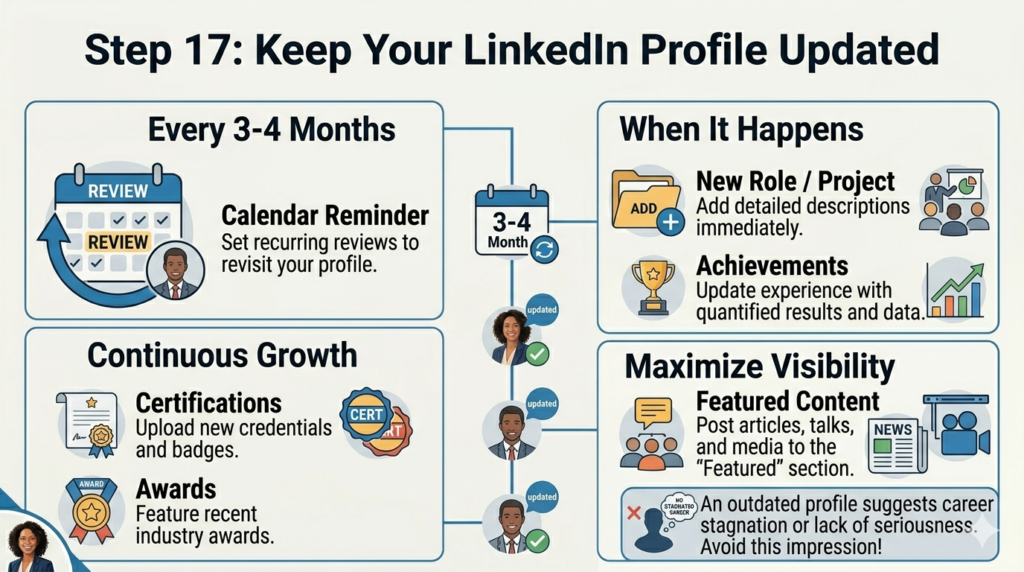
Step 17 — Keep Your Profile Updated
Your LinkedIn profile is a living document — it should evolve as your career evolves. Set a calendar reminder to review and update your profile every three to four months.
When you take on a new role or project, add it. When you complete a new certification, add it. When you achieve something significant at work, update your experience description to include it. When you write an article or give a talk or win an award — feature it.
An outdated profile sends the wrong signal. It suggests either that your career has stagnated or that you do not take your professional presence seriously. Neither is an impression you want to create.
Your LinkedIn Profile Launch Checklist
Before you consider your profile complete and ready to share, run through this checklist:
Your profile photo is professional, clear, and well-lit. Your background banner is customized and professional. Your custom URL is set and clean. Your headline goes beyond your job title — it includes keywords and communicates your value. Your contact information is complete. Your About section is written in first person, tells your professional story, and ends with a call to action. Every work experience entry has a substantive description with specific accomplishments. Your education section is complete with relevant details. You have listed your key certifications and licenses. You have added at least fifteen to twenty relevant skills. You have at least one or two recommendations. You have activated the Featured section with your best work. Your profile has reached LinkedIn’s All-Star completeness status. You have at least fifty connections and are actively building more.
Every item checked? Your profile is ready.
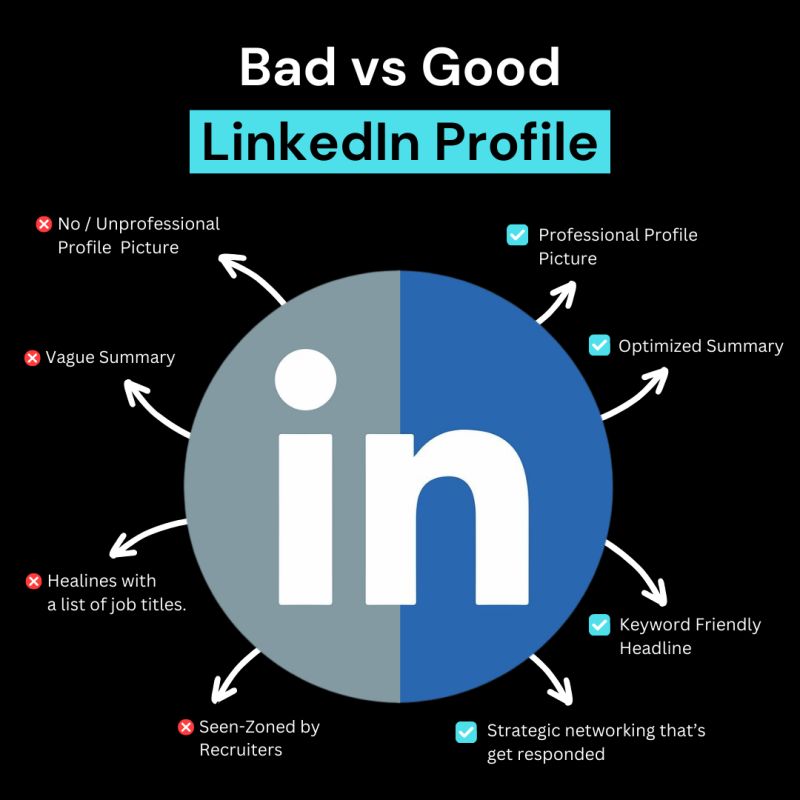
Common LinkedIn Profile Mistakes to Avoid
A missing or unprofessional profile photo. No photo makes you invisible. An unprofessional photo actively hurts you. Invest thirty minutes in getting a good shot.
A headline that is just your job title. Your headline is prime real estate — use it strategically.
An empty or generic About section. If your About section reads like a dull resume summary, rewrite it as a genuine professional story.
Work experience with no descriptions. Empty experience entries provide no information about what you did or achieved. Every role deserves a substantive description.
Connecting with everyone indiscriminately. A large irrelevant network dilutes the value of LinkedIn for you. Be intentional about who you connect with.
Being completely inactive. A profile you never touch is a missed opportunity every single day. Even minimal, consistent activity — one post per week, a few thoughtful comments — makes a significant difference.
Ignoring the skills section. Skills are searchable keywords. Neglecting this section hurts your search visibility.
Never asking for recommendations. Recommendations are powerful — but they will not appear on their own. You have to ask for them.
Final Thoughts — Your LinkedIn Profile Is Your Professional Reputation Made Visible
Every day, people are searching LinkedIn for exactly the kind of professional you are. They are looking for someone with your skills, your experience, your background, and your expertise. The question is whether they find you — and whether, when they do, your profile makes them want to reach out.
A great LinkedIn profile is not about showing off or exaggerating your achievements. It is about representing yourself honestly, completely, and compellingly — so that the right people can find you and recognize that you are exactly who they are looking for.
You have spent years developing your skills, accumulating your experience, and building your professional reputation. Your LinkedIn profile is where all of that work becomes visible to the world.
Now you know exactly how to build it.
Start today. Fill in every section thoughtfully. Write with honesty and intention. Connect with people who matter professionally. Show up consistently.
Your next opportunity is out there — searching for someone just like you on LinkedIn right now.
Make sure they find you.

Written by Digital Drolia | Helping professionals build a powerful digital presence — one profile at a time.