![]()


How to Control WordPress Admin Access Based on IP Address in 2023 For Strong Security
Do you want to control the WordPress Administrator access area for security reasons?
If you have a small team, one good solution is to control access to only team members’ IP addresses.
This article will show you how to control WordPress admin access based on IP address.
Why Restriction WordPress Admin Access Based on IP Address?
If you run a WordPress website, you must take your website’s security seriously. While the WordPress core software is extremely secure, there is more you can do to keep hackers at bay.
Hackers can give your website down, as well as harm your revenue and reputation. They can steal data or even distribute malware to your website visitors, causing Google and others to blacklist your domain.
Protecting your WordPress admin area from unauthorized access is a clever way to keep hackers out.
If only you or a few trusted users need access to the admin area, restrict access to wp-admin to your team’s IP addresses.
Each member of your team will connect to your website using a unique IP address for each location. If you block access to all other IP addresses, a hacker will be unable to access your website even if they have discovered your username and password.
Instead, they will see the following error message: ‘Forbidden. You do not have access to this resource.’
Let’s look at how to control WordPress admin access based on IP address.
NOTE: You guys need to keep in mind that for regular updates of DIGITAL DROLIA blogs just SUBSCRIBE the corner red bell icon for received the notification of new blogs.
How to Control WordPress Admin Access Based on IP Address
The first step is to compile a list of the IP addresses used by everyone who needs to access your WordPress website. If someone works from multiple locations, you must collect the IP address for each one.
They can find out their IP address by going to a website like Supportally.
After you’ve created your list, you’ll need to edit a file on your website. You’ll need to use an FTP client or the file manager provided by your hosting provider. If you’ve never used FTP before, you should read our guide on how to use FTP to upload files to WordPress.
You must use the software to navigate to the /wp-admin/ folder on your website. Once there, search for the .htaccess file. Because this is a hidden file, you may need to enable the show hidden files option in your software.
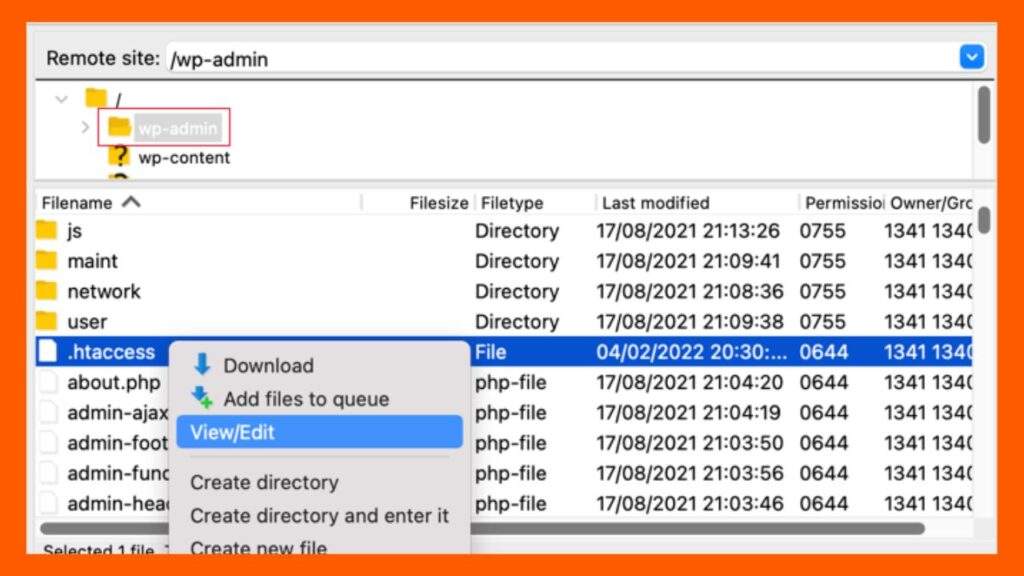
If that file does not exist in the folder, you should create a new one and save it in the /wp-admin/ folder with the name .htaccess.
Warning: Do not modify your root .htaccess file or you will prevent visitors from accessing your website’s front end! Make certain that you are editing /wp-admin/ .htaccess.
You should first save a backup copy of the file to your computer. After that, you’ll need to edit .htaccess and insert the following code:
Edit the file to match the names of your team members, and then replace the xx.xx.xx.xxx with the IP addresses you collected earlier.
Only those IP addresses will be able to access WordPress admin after you save the file.
Keep in mind that if your IP address changes or you attempt to access your website from a different location, you will be locked out of your WordPress admin area. You must update the /wp-admin/ .htaccess file with your new IP address.
We hope this tutorial taught you how to control WordPress admin access based on IP address.
If you enjoyed this article, please subscribe to Digital Drolia on the Website. We can also be found on Facebook, Instagram, Youtube, Linkedin, and Twitter.
Our Services: If You Need Online Promotion, Website Designing And Graphic Designing. So Whatsapp us on this Number
+91-8307206428


